Beginner's Guide to Online Image Editing: Easy Steps to Transform Your Photos
Learn online photo editing with this complete beginner's guide. Master essential image editing techniques, from basic adjustments to advanced features like background removal and text overlay.
Ever snapped a photo that looked perfect on your phone screen, only to find it looking dull, crooked, or a bit off when you actually checked it later?
It's a problem for everyone. Maybe the lighting was weird, there's a random stranger photobombing in the background, or the colors just don't pop the way you remember them. To fix these issues, you don't need expensive photo editing software or years of experience.
In this beginner's guide to photo editing, we'll walk through everything you need to know about editing images, from basic photo adjustments to advanced features.
Why Choose Online Photo Editing Tools
Before we jump into how to edit photos, let's talk about why browser-based photo editors are worth your time.
- No software downloads required: Online image editors work directly in your web browser. No need to install bulky photo editing programs that take up space on your computer or phone. Just open a website, upload your image, and start editing photos immediately.
- Edit pictures from anywhere: Whether you're on your laptop at home, at work, or using a friend's computer, your photo editing tools are always available. Just log in and pick up where you left off.
- Free photo editing options: Many powerful online photo editors offer their core editing features completely free. You might run into some premium photo enhancement options, but for most everyday image editing needs, the free versions do the job beautifully.
- Surprisingly powerful editing capabilities: Don't let the online part fool you. Modern browser-based image editors can handle everything from simple photo cropping to complex edits like background removal or color correction.
Requirements for Getting Started with Photo Editing Online
Starting with online picture editing doesn't require much. Here's your basic checklist:
- A digital photo to edit: This might sound obvious, but starting with a good-quality image makes photo editing easier. Pictures taken in natural light, especially indirect sunlight, tend to need fewer adjustments. That said, don't stress if your photo isn't perfect; that's exactly what image enhancement is for.
- A stable internet connection: Since these online editing tools work in your browser, you'll need to be online. Most photo editors aren't bandwidth-heavy, so even a basic connection should work fine.
- Any modern web browser: Chrome, Firefox, Safari, Edge, they all work for photo editing online. Just make sure your browser is up to date.
That's really it. No fancy equipment, no paid subscriptions, no credit card required to start editing your photos.
Essential Photo Editing Techniques for Beginners
Now let's get into the actual image editing process. We'll cover the fundamental photo editing skills that apply to almost every picture and make the most noticeable improvements to your images.
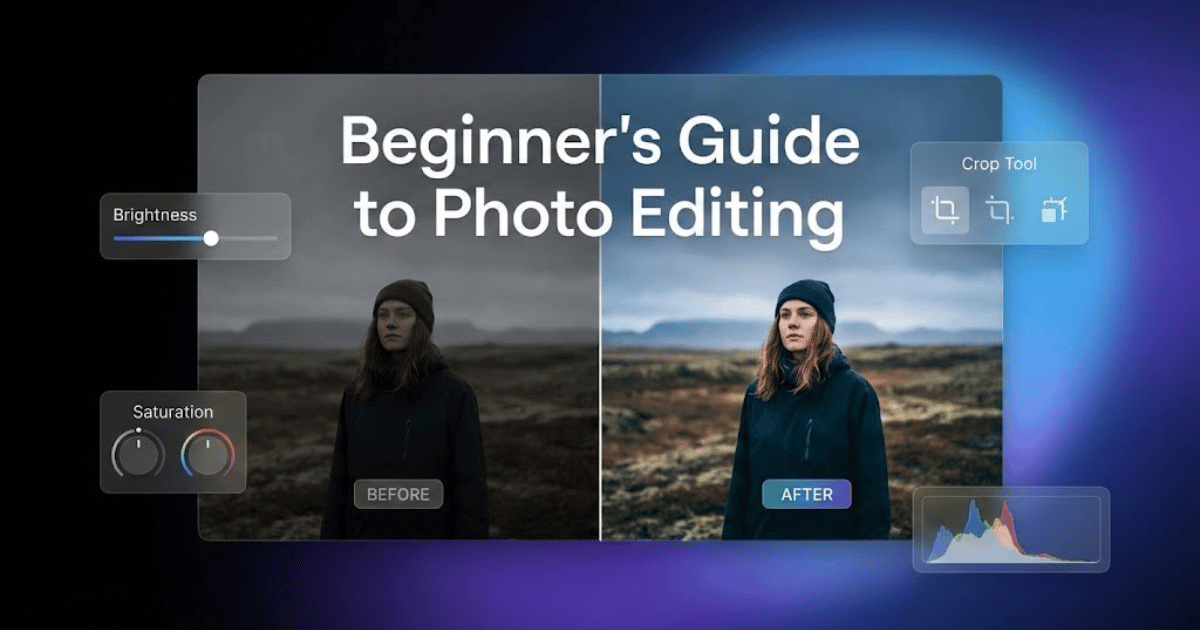
Crop and Straighten Photos
Cropping is usually the first photo editing step you should take. The crop tool lets you remove distracting elements around the edges, zoom in on your subject, or change the composition of your image entirely.
You might have taken a landscape photo where the horizon looks slightly tilted. That's where the straighten tool comes in. Most photo editors have a simple rotation slider that lets you fix crooked horizons in seconds. A straight horizon line makes your photos look much more professional.
Quick tip: When cropping images, think about what you want viewers to focus on. Everything else in the frame can probably go.
Adjusting Photo Brightness and Exposure
Photos taken indoors or in low light conditions often come out darker than we would like. Increasing the brightness setting can bring life back to underexposed images.
Here's the difference between brightness and exposure adjustments:
- Exposure correction affects the entire image, including the very bright and very dark areas.
- Brightness adjustment mainly affects the middle tones, leaving the highlight and shadow extremes less changed.
If your whole picture looks too dark, start with exposure. If it's mostly okay but just needs a slight lift, try the brightness slider.
Watch out for: Don't push these settings too high. Over-brightening can make your photo look washed out, and you might lose image details in the lightest areas (photographers call these "blown-out highlights").
Working with Image Contrast
Contrast in photography is about the difference between the light and dark parts of your picture. Low contrast can make photos look flat and muddy. Higher contrast makes colors pop and details stand out, but too much contrast can look harsh and unnatural.
Think of contrast adjustment as adding punch to your photo. A small tweak often makes a bigger visual difference than you would expect.
Adjusting Color Saturation
Saturation controls how vibrant and intense the colors in your photo appear. If your picture looks a bit dull or washed out, a touch more saturation can help bring out the colors.
But here's where many beginners make a mistake. They overdo the color saturation. Over-saturated photos look unnatural and can actually be unpleasant to look at. The goal is usually to make colors look like they do in real life, or maybe just slightly more vivid.
Some photo editing tools have a "vibrancy" slider in addition to saturation. Vibrancy adjustment is often more forgiving because it boosts the less colorful parts of your image without oversaturating already bright colors.
White Balance Correction
Have you ever noticed that indoor photos sometimes look yellowish, or pictures in shade look bluish? That's a white balance problem that affects the color temperature of your image. White balance adjustment controls the overall warmth or coolness of your photo:
- Warmer tones (more yellow/orange) give a cozy, golden hour feel.
- Cooler tones (more blue) can feel crisp, clinical, or wintery.
Most of the time, you want whites to actually look white in your photos. If they are tinted, adjust the color temperature until things look natural. But there's no strict rule; sometimes a warm sunset photo looks even better with a bit more warmth added.
Sharpening Your Images
Image sharpening is especially useful for photos that look slightly soft or out of focus. The sharpening tool enhances the edges in your image, making fine details more defined and crisp.
A little sharpening goes a long way. Over-sharpening creates ugly halos around edges and can make your photo look artificial and heavily processed. Make small adjustments and zoom in to check the sharpening results before saving your edited image.
Advanced Online Photo Editing Features
Once you have got the basic editing techniques down, you can explore some advanced features that really add polish to your photos.
Background Removal Tools
Removing photo backgrounds used to require serious graphic design skills and expensive software. Now, plenty of free online tools can remove the background automatically in seconds. Instacut Studio AI-powered background removal tool erases your background in seconds using smart selection technology.
This feature is incredibly handy for:
- • Product photography
- • Profile picture
- • Creating transparent PNG images for social media graphics or presentations
The background removal results aren't always perfect, especially around hair or fine details, but for most uses, they're impressively accurate.
Object Removal and Photo Retouching
Photobomber ruining your shot? Trash can in the background ruin your beautiful travel photo? Many photo editors now include retouching tools that can remove unwanted objects from images. These tools go by names like "spot healing brush," "clone stamp tool," or "object eraser."
They work by replacing the area you select with similar surrounding pixels to seamlessly blend the edit. Simple object removals work great; complex ones might take a few tries to look natural.
Adding Text and Graphics to Photos
Whether you're creating content for social media, designing a greeting card, or labeling a tutorial image, adding text overlay to photos is super practical.
A few typography tips for photo text:
- Readability is everything: Choose fonts that are easy to read, especially at smaller sizes.
- Color contrast matters: Light text on light backgrounds (or dark on dark) gets lost. Use contrasting text colors or add a subtle drop shadow.
- Keep it simple: One or two fonts maximum. Too many different fonts look messy and unprofessional.
Photos Filters and Effects
Photo filters can quickly change the entire mood and aesthetic of your image. They're especially popular on social media platforms where a consistent visual look across posts help builds a recognizable brand style.
Just remember: filters are like spices in cooking. A little can enhance your photo; too much overpowers it. Many photo filters look best when you dial down their intensity to 50-70% rather than applying them at full strength.
Image Resizing and Compression
Different platforms require different image dimensions and file sizes. What works great on Instagram might look terrible as a website banner. Most online photo editors let you resize images for specific uses, such as social media posts, email headers, profile pictures, web optimization, and more.
When resizing photos, keep in mind that enlarging images beyond their original resolution can reduce picture quality and cause pixelation. Making images smaller or compressing file size is usually fine for web use.
Creating Photo Collages
Photo collages are perfect for displaying multiple related pictures together, before and after comparisons, step-by-step tutorials, even highlights, or just collecting your favourite moments in one image layout. Many online photo editors have collage templates that make arranging multiple photos easy.
You just drop your pictures into the preset grid slots, maybe add some text, and you're done with a professional-looking collage.
Best Free Online Photo Editors for Beginners
With so many online image editing options available, it can feel overwhelming to pick the right one. Here are some reliable free photo editors, each with their own strengths.
Canva Photo Editor
This is often the go-to recommendation for complete beginners, and for good reason. Canva's drag-and-drop interface makes photo editing and graphic design feel natural right from the start. Beyond basic image edits, Canva shines when you want to create graphics, social media posts, presentations, posters, and marketing materials.
Photopea Online Editor
If you've ever wished you could see Photoshop without paying for expensive software. Photopea is surprisingly close. It runs entirely in your browser but offers professional-level photo editing capabilities, including layers, masks, and blend modes. It handles complex photo edits, working with RAW image files and PSD file support. It's genuinely powerful for a free browser-based editor.
Pixlr Photo Editor
Pixlr gives you options depending on what you need. It is perfect for quick, simple photo edits. It goes deeper, offering more control over your image adjustments. Both versions work directly in your web browser.
Foto Photo Editor
Fotor keeps things straightforward for quick photo editing. The editing workflow is simple: upload your photo, make your adjustments, and download the edited result. No distractions, no complex menus to navigate. This platform really does well with quick photo touch-ups, batch editing multiple photos at once, collage creation, and one-click enhancement.
Common Photo Editing Mistakes to Avoid
While we're learning to edit photos, it helps to know what not to do. Here are the editing mistakes we see beginners make most often:
Over-Saturating Colors
This is probably the number one photo editing mistake. Cranking up color saturation feels exciting at first; your sunset looks like an explosion of vivid color. But scroll through social media, and you'll spot over-saturated photos immediately. Skin tones look unnaturally orange. Grass looks radioactive green. When it comes to saturation, less really is more.
Ignoring the Histogram
Many photo editors show a histogram, a graph displaying the distribution of light and dark tones in your image. Learning to read this photo editing tool helps you spot exposure problems. If the graph is pushed too far left, your image is underexposed. Too far right, it's overexposed. Understanding histograms gives you objective data about your photo's tonal range.
Over-Sharpening Photos
Sharpening feels like a magic fix for slightly soft images, but pushing the sharpening slider too far creates ugly halos around edges. Zoom in to 100% view before finalizing your sharpening adjustments; what looks fine when zoomed out might look terrible at actual size.
Editing on an Uncalibrated Monitor
This is trickier to fix, but worth knowing about. If your computer screen displays colors inaccurately, you might edit your photo to look perfect on your screen, only to find it looks off on everyone else's devices. Phone screens and laptop displays vary widely in color accuracy. When possible, check your edited photos on multiple devices before publishing or printing.
Forgetting About Photo Composition
All the color correction about photo enhancement in the world won't save a poorly composed picture. Before you start adjusting editing sliders, ask yourself: Is the subject clear? Would cropping improve the composition? Sometimes the best photo edit is just removing distracting background elements around the edges.
Photo Editing Tips for Better Results
Here are final thoughts to get the most out of your photo editing:
- Start with the best photo you can capture. Photo editing can fix many problems, but it can't work miracles. Photos taken in good natural light with a steady hand give you much more to work with.
- Don't over-edit. Pushing every slider to extreme values is a common beginner mistake. Subtle adjustments produce more natural-looking results.
- Keep original image files. Always work on a copy. You might change your mind later or find a better approach once your skills improve.
- Step away and come back. After editing, your eyes adjust to what you're seeing. Taking a break often reveals over-editing or issues you missed.
- Practice regularly. Like any skill, photo editing gets easier the more you do it. Edit a few photos weekly to develop your unique editing style.
Start Your Photo Editing Journey Today
Online image editing has genuinely changed what's possible for everyday photographers, content creators, and small business owners. Photo editing tasks that once required expensive desktop software and specialized training are now available to anyone with a web browser and an internet connection.
The best way to learn photo editing is simply to experiment. Grab a few digital photos you've taken recently and try out the editing techniques. Crop them, adjust the lighting and exposure, and play with color settings. Make mistakes, that's how you figure out what works and develop your editing instincts.
You don't need to master every photo editing technique at once. Start with the basics: cropping, brightness adjustment, and contrast. Once those essential edits feel natural, add more advanced techniques to your editing toolkit. Before long, you'll be editing photos with confidence, creating images that genuinely reflect what you saw and felt when you captured them.
Frequently Asked Questions About Online Photo Editing
Do we need accounts to use free online photo editors?
Not always. Many tools let you edit without signing up. Creating an account usually unlocks premium features or cloud storage, but quick edits rarely require registration.
Will photo editing reduce image quality?
It depends on export settings. Saving in high-quality formats preserves quality. Repeatedly editing in lossy formats can degrade picture quality, another reason to keep original files.
What's the difference between editing and photo manipulation?
Editing means enhancing what's there, adjusting brightness, improving colors, and cropping. Manipulation changes actual content, like swapping backgrounds or combining photos. Both have their place.
Can we edit photos on phones?
Absolutely. Many online editors work in mobile browsers, and tools like Canva, Pixlr, and Fotor have dedicated mobile apps with touch-optimized interfaces.
Ready to Start Editing Your Photos?
Try Instacut Studio's powerful online image editing tools. Remove backgrounds, compress images, enhance photos, and more—all for free!
Start Editing Now